About Me:

My photo
Welcome! I'm a neo-hippie chick working to balance my love for all things earthy and natural with all things glamourous and spectacular! And all, naturally, on a serious budget! I want to share my adventures with my family back home in Los Angeles and.....all of you!

Wednesday, October 19, 2011

Easy (and Free!) Hallway ReMix

Hello. Today was a bit of a strange morning. I awoke at 6:30am (that's the strange part) and just decided that it was the day to decorate the hallway. Why right now? Maybe I was inspired by the Phoenix needlepoint art I found at the thrift store the other day?

I think it's fun & funny!

Maybe I was tired of looking at the land of forsaken pictures left in the upstairs landing? (which will one day be our office area)

 Or maybe I just wanted to have a little more fun downstairs!!! Why should you have to trek all the way up one whole flight of stairs to see some color???


Well anyway, this is what happened:
I moved the wine rack that was soon headed for Craig's List
if he didn't find another home other than here
in the dining room nook....

I'm making room for a buffet in this spot. Sadly, these bar stools did not get
another chance at life in this house. A Craig'sList casualty they did become.

....into the hallway between the laundry and powder room...


   .....added a few accessories stolen from other places (from my own house, not really stolen) ....


hung the pictures (all by myself) with a minimum of swiss cheese wall treatment,


....and VIOLA!

Sorry 'bout the shot of me in the mirror.....

A fun place to land your eyes when you arrive through the garage, and an interesting reception when you vacate the powder room! And all for no money! I already had all of the items waiting for a home. (Well, I spent $6 on the needlepoint art, so, just a little money)

.....so here's a shot of my hubby!! (just to be fair!)
So whatd'ya think about the new hallway? I think it's fun! What do you think??
Tell me all about it in the comment box!!

Saturday, October 15, 2011

"THE" LIST. Items 1-10

I don't like to call it "The Bucket List". I'm not about to "kick the bucket". I just wanna get started on some of my silly life goals.

I thought about calling it "Fantasy to Reality", or "Day Dreams to Day Light" or something clever like that, but I haven't come up with exactly the right title yet. So until I do, I'm just going to call it "THE" List.

It will be a list of 100 goals that I will present in 10 separate posts with not a lot of fanfare. Systematically, I will attempt to complete them. How long will it take to do? I don't know yet. A year? 10? A lifetime? Maybe I'll separate them into categories of time allowable. That seems reasonable.

I don't want there to be any extreme pressure to complete these items, but then again, if I didn't want any pressure, why would I make such a proclamation in front of the entire world-wide-web???
Aha, could it be that I need a little outside motivation, but am secretly terrified of me holding myself, and the whole world holding me accountable to my word???

Duh!!

Well, let's not over think this just yet. For now, I'll just start my List.

Here it is. Numbered in no particular order, just as they come to me.....


  1. Learn to Juggle
  2. Fly Through The Air With The Greatest of Ease (on a trapeze)
  3. Write and Perform An Original Song (written by moi, of course)
  4. Shave My Head. (yes, bald. this item may incur unintended ramifications, such as divorce, but we'll cross that bridge when we get to it!)
  5. Go Hot Air Ballooning
  6. Visit Russia
  7. Memorize Something Worth Memorizing
  8. River Raft Down the Grand Canyon
  9. Collect and Display One Million Like Items
  10. Learn To Do a Back-Hand-Spring
Hmmm....looking at the list of my desired skills maybe confirms my husband's suspicion that I want to run away with the circus!
I've already taken action towards a couple of items. For example, I found this book at the thrift shop for $1.

It's copyright 1977 (my birth year) as you can probably gather from the illustration.
and it promises....
Sounds like the instruction manual for me!
I also have had already had one back-flip lesson from a girlfriend of mine who is in Cheer or is a Tumbler at ASU (I've forgotten which, and I know they get really riled up about calling them the right one....I don't know if there's a difference....)

I plan to document the journey here on this blog, so get ready for some awkward videos folks!!

So, what do you think of my first set of life goals? Leave me a comment and let me know!

TTYL,
Aut

Friday, October 14, 2011

{Renter's Room Reno} Tips and Tricks

We make it look really easy, right?

WELL IT WASN'T!!!

I'm so sorry, I didn't mean to yell, but this took a lot of time! And brain teasing mathmatical measurment caluculations. Was it worth it? Well.... yes, but it was still really hard! (But for the results we got, I'd do it again in a second!)

Earlier I promised that a few tips and tricks, and I'm not one to go back on a promise, so here goes....

TIP #1
To make your small room appear larger, paint a faux recessed ceiling and chair rail.


This little element has a lot of visual impact and is oh, so easy to do. It's actually easier to do than not to do...(did that make any sense??? Well anyway....)

Here, you can see that I've painted the enitre ceiling bright white. I painted it without any regard for the corners. Then I taped a line all around the ceiling about 10" in.

I also taped in a 3" faux chair rail at about 26" high. Usually a chair rail is installed at about 3' or 36". Making your chair rail lower than normal enhances the feeling that the room is taller, and therfore larger.
(You can see the chair rail tape in all of the pics above.)
The purpose of the "recessed ceiling" is to give the ceiling visual depth, also making the room look taller.

After we had all the taping done, we painted the entire room with Valspar's Tempered Gray in Satin Finish. The faux recessed ceiling made painting the corners and wall crease so easy to paint because we didn't have to worry about keeping the wall color off the the ceiling and the ceiling paint off the wall. (That is, if you are used to painting your walls and ceilings different colors.)
That brings us to

TIP #2
When painting over painter's tape, to achieve a crisp line, always paint with a light hand.

This will probably require that you dip your roller in paint more often, and perhaps even change out your roller mid-job. But it's really, really worth it. There was a spot where I noticed my hubby pushing very hard on the walls with the roller, and when I removed the tape, the line was not very crisp. Where he had plenty of paint on the roller and was able to roll pretty lightly, the results were much, much better. (It's pretty counter intuitive, I know, but hey! Whatever works!)

TIP #3

If you want a really crisp line, smooth a thin line of paintable caulk over your tape.

I haven't used this tip yet personally, but my next-door neighbor demonstrated it on his painting project with professional results. It takes a little more time, but if you want to look like you reeeally know what you're doing, it's the way to go! (you'd better belive that's what I'm doing next time!)

Those are all the tips I have for you today. Let's hurry up and get to the reveals, right???

Here we gooooo.......


Borrrr-iiiing.

Oh, so classy!

I was a little nervous deciding if the Flaming June would work with the new wall color...

....but was instantly relieved once I saw it all together. (The wall color actually cradles the painting!)

We replaced our very sophisticated air flow system from

to.....


an inexpensive and attractive ceiling fan. The fan was $120 at Lowes.


Headboard was given to us by a friend when we moved in. See what we did to it to fancy it up.....later!!!

What??? That's all you get???
Yep! I gots to string you along just a little more!
In the next post I'll show you what I used to inexpensively style our guest room to make it feel like a luxurious 5 star hotel room..... or at least a really nice B & B....;) !!

Feel free to leave me a comment. I'd love to hear what you think so far. Also, submit your email address in the "follow by email" spot if you'd like me to personally deliver all of my adventures directly into your inbox! I can, because I'm magic like that!

Kisses!
Autum


Tuesday, October 11, 2011

{Agritopia Community Garden} Month #1 Update


Hey, where are all of the seedlings???

Yeah, that's what I said too!!

I guess the weather was still a little too hot to plant when we did and the seeds didn't sprout. I thought it would be ok to plant since the nights had cooled down to high 80's. Huh. Guess I was WRONG!! Or maybe the problems with the well did it. Not enough water. Either way, we've got some RE-planting to do if we want any veggies this season!

What in heaven's name would we have done if we were relying solely on this garden for our food? Well, I'll tell you what, we probably would not have waited a whole month to decide that we needed to take some action and reseed, for starters! Oh well. You live and you learn. I'm headed over to the plot tomorrow to sow once again! Hopefully the second time's the charm....

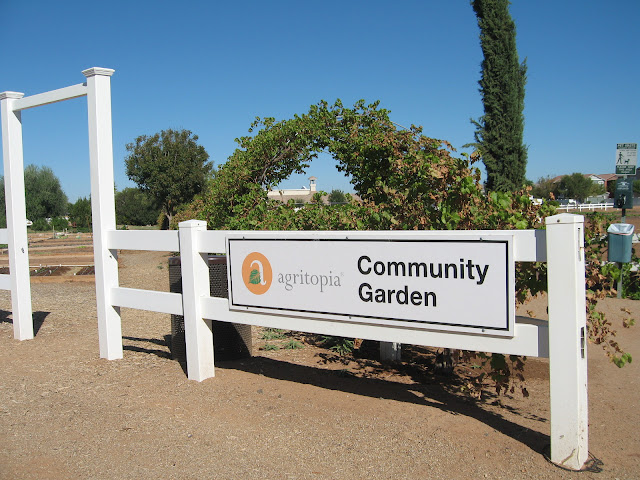
Since there's nothing major to report in our plot, I'll take this time to show you around the community garden grounds.


Located at the corner of Ray & Higley (yes, the street is called "Higley"!!!)
Agritopia is a housing subdivision that was constructed with a bigger goal of just the usual cramming in as many houses as possible. Origianlly owned by the Johnston Family, it was built with  large portions left for commercial and agricultral uses. Aside from the community garden plots, there is a large field that is cultvated  with all sorts of goodies, some of which sold at the self-serve Farm Stand right out front.
[stand0418.jpg]
As you turn the corner from Higley onto Ray, you'll see an orchard of what I think are some sort of nut trees. (The trees are still young and I haven't yet taken the time to ask anyone what they are.) Lining Ray Rd is Joe's Farm Grill and The Coffe Shop.
Joe's Farm Grill is uniqe in two ways. It sits in the renovated builing that was once the dwelling of the family that owned the land. The owner, Jo Johnston has been called "The Best Thing That Ever Happend To Gilbert"!.... (this distinction was give to him by a foodie friend of mine when she saw the episode of Diners Drive-Ins and Dives that the grill was featured on!) In the episode you will see that Joe's Farm grill sources as much produce as it can from the large field that they maintain. (The restrooms are reeeallly fun too! I have a pic, but I don't want to give it away!! You have to go there for yourself and see it!!) Keep going on Ray and you'll see lots Peach, Apricot, Grapefruit and other trees that are opened for U-Pick each appropiate season.

In the community garden there are 30-some 20x20 plots that are leased by individuals, familys and groups. Most of us are novices to gardening so we all get to learn from each other's successes and shortfalls.


Here are a couple of our garden neighbors with their bikes that they ride over on to the plots. Their real estate looks really great! They've got eggplant, peppers, basil  that survived the entire summer, (We don't have ONE thing that survived. Can you feel the bitterness??) and so kindly shared some with us! Thank goodness for nice people!!

Why I don't have a gnome in my garden already is beyond me!

Everyone can plant whatever they like, however they like, and add their own personal touches as they wish.


We have a sink to do veggie washing, a shed filled with tools that we all may use, a bbq grill and picnic benches.

Conveniently located directly across the street is  The Coffee Shop where we can grab a cold drink after a hot day of hard work. (More like an hour to an hour 1/2 of hard work! Let's be honest here....) The Coffee Shop is a great independent place that we LOVE and has the PRETTIEST Cupcakes ever!!! I'm so obsessed with the sparkles that they use on them. I've searched hi and low for the pixie dust (that's what I call it) and I finally found it!! I'm the happiest girl in America!

We feel so enormously lucky to have our own little patch of dirt to grow food in. If you'd also like your own plot, surrounded by people to help and support you grow your own veggies in Gilbert, email Gayle at 
gayle@johnstonfarms.phxcoxmail.com
and she'll give you all the info!!

And don't forget to visit this blog again to see what's new in the garden. We might even be willing to share with you!

Monday, October 10, 2011

Faux Paneling Project

What A Week!!!!!
I thought that renovating the Rotating Renters' Room would take just the weekend. Boy, I sure did fool myself!

This is how my grand renovation commenced. I started planning the painting project on Thursday. I spent all, and I do mean all day Friday taping and prepping for paint, Saturday taking a mental break from all things decorating, (I mean, there's only so much time one can spend starting at the walls, right?) Sunday I spent actually painting, and Monday saw us beginning to stage out the room. We pretty much finished it up (minus some tweaking of course) on Tuesday. Whew! Was it worth it? Well, if you asked me on Friday, you would've gotten the quickest NO in the west. But when you see the finished product.....well, you'll get to judge for yourself!

But you won't see it today, of course. What? You think I'm gonna give it to you all in one go? Ha! If I had to wait a week to see it, then so do you!!!

What I will do is take you on the journey with me. How's that?

It took many many hours to get to this point!

I'll start with the faux panels. I wanted to give this room some architectural interest. Since I can't get enough of paneled walls, I decided to finally attempt it myself. I did a faux paneling with paint instead of wood because paint was something I could easily pull off by myself. Plus, I don't know how to use the saw (--yet), and a gallon of paint and a couple rolls of tape were going to cost me a lot less than 90 some feet of wood trim. What I had yet to find out was that, while this project was going to be easy on the pocketbook, it would prove to be not exactly easy at all!****(Sidenote----I don't want to discourage anyone from trying this project, or a project similar to it. I just want to be honest about the time invested and my own experience.) 

What I first needed was a design. I picked out some inspiration I found on the web and posted it in this previous post. I didn't want to completely rip off these designs sooooo..... I completely ripped off the design of a mirror that I already had hanging on my wall downstairs!!!


The simple repeating square shapes would be the easiest to tape out, making it the perfect design.

The good thing is that I changed the shape from a square to a rectangle, thereby repeating a design element thoughout the house, but also giving some variation to it at the same time.

Here are my very professional idea sketches. ;)
On paper, I worked out the dimensions and locations of the shapes. This took forever. I'm not very good with dimensions. This fact may be a major concern in me becoming a carpenter. (oh yeah, one of my crazy dreams is to become a carpenter.)

Then I mapped out my rectangles on the wall.

I painted the ceiling white, then taped a line 10" in, all around the room. (I'll tell you why later!)
Conventional instructions will tell you to paint the entire wall the underneath color, but since I only had a partial can of white, I decided to block out my rectangles and only paint the areas where I would tape the design in.

Here we have what one would call a "big blotchy mess". Don't worry though; it's all part of the plan. (That's what I kept telling myself!!!)
 Let that dry, and then I started taping.


And taping.....


......and taping........

.........and taping.......!!!!!


I have to admit, this is the perfect project if you have more time than money. It involves taping---hours.....and hours......and hours of taping. And planning. And measuring. And screwing up. And leveling tape. And, have you ever tried to level tape? Not easy. A strip of tape is not a solid piece of wood. It pretends that it's nice and straight, so you press it down, and then voila! You see that the top edge was totally hiding under the level and now you have a perfectly diagnol line! Greeeeat!

By the time I had most of the taping done, I was jumping for joy! That's when I brought my hubby in to help me paint the walls. (Although he did do the taping of the chair rail. I can't give myself all of the credit!)


The paint color I used is Tempered Gray in Satin Finish from Lowe's.


Ok, it's painted. Now it's time to pray......

Will all of that work be worth it??? How will my faux panels come out?????

 Rip The Tape Off!!!  Heeeere gooooes!!!


Hooraaayyy!!! Looks fantastic right???? I sure think so!!

Stay tuned for a post with more completed faux paneling pictures. Thanks for stopping by!

Friday, September 30, 2011

Rotating Renter's Room Renovation

Our 3rd bedroom has many names. Guest Room, Renter's Room, Sister's Room. (My sister lives in Los Angeles but has claimed our spare bedroom as her own, giving "permission" to our visiting friends to sleep in it.)

In about a week, I have a girl-friend coming to visit and I'm super excited!! The guest room is absolutely presentable, but I want to make it more special than just ok. Sooo.....I'm gettin' to work!

What the room is right now is probably what everyone's spare room is....where all cast-offs live. The problem with my particular guest room inhabitants is that they are in a color palate that isn't necessarily cohesive with the rest of my house....and if there's anything that I learned from my mama, it's that your whole house needs to live in harmony. So I have to make it work!! (And plus, I don't have lots and lots of money to go out and buy new stuff!) The color palate that I've chose for my house, so far, is a cool one. Blues, Greys, Whites, and I've recenty been throwing in Reds and Magenta. The stuff I have from my apartment dwelling days are mostly warm greens and browns.

I know the room is gonna look just FanTastic when it's all put together. I'm going to do a couple projects in there that I've been dreaming of doing forever......(on the super cheap, of course....)

Here are some before pics of the room, followed by some inspiration.....

I took the bed clothes off just so the "before" would look extra bad!! j/k...

The "Flaming June" picture has been in my possesion since I was a single gal.


 Here's what's got me goin'.....
2011_3_16-DabbleDIY.jpg
via
Ava pink princess baby nursery with faux wall paneling
via

 
I love the color contrast with all the molding. And since my Arizona desert house has absolutely NO character, I figured that a paint option would be a perfect starter project for me. The real molding will happen soon enough. I just need to do some real planning for that. Oops! Did I just give away my whole plan??? Oh well, you would have found out soon enough anyway.....

Come back to this site to learn how to do stripes and faux molding the easy(-er) way!
BTW, my goal in decorating life is to eliminate as much taping as possible! If you are of the same mind, you probably will want to come back and find out how.....